Batmobile Baby Stroller
Get ready for some serious toddler (and parent?) envy! Top Hollywood prop makers Super-Fan Builds have created this ultimate Batmobile stroller.
Would you wheel one??
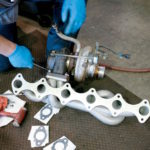
How To Diagnose & Avoid Common Fastener Failures
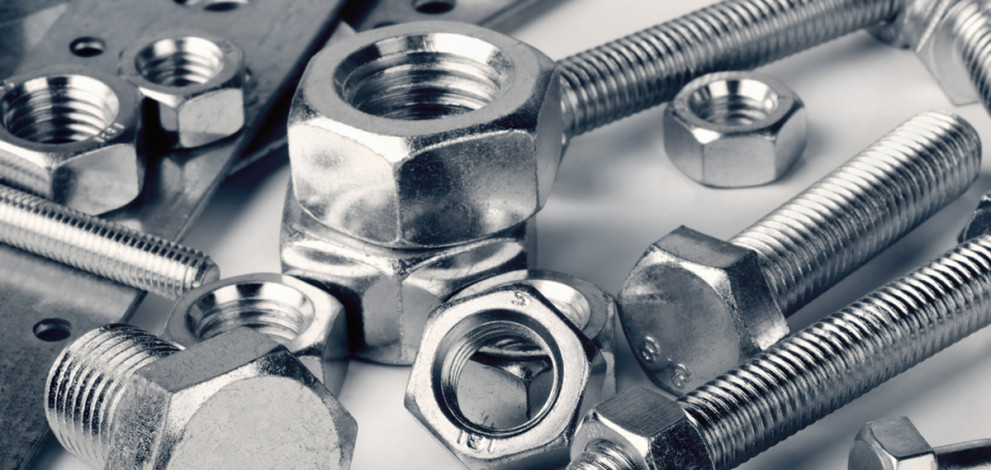
Even the strongest metal fastener can fail.
And it will likely fail in one of six ways.
The good news is that if you properly analyze the failed component, you can easily diagnose the reason behind its sad end.
And when you know why a fastener failed, you can prevent it from happening again in the future.
If we listen to what ARP has to say – and after all, they are a recognized leader in fastener technology – each one of these six different failures can be identified by their unique characteristics.
All you need is a three-lens magnifying glass.
Once you have a close-up, follow this simple guide to interpret what your fastener’s physical characteristics are trying to tell you.
FAILURE #1 – TENSILE OVERLOAD
FAILURE #2 – TORSIONAL SHEAR (TWISTING)
FAILURE #3 – IMPACT SHEAR
FAILURE #4 – CYCLIC FATIGUE
FAILURE #5 – CYCLIC FATIGUE CRACKS PROPAGATED FROM RUST PITS
FAILURE #6 – CYCLIC FATIGUE CRACKS CAUSED BY IMPROPER INSTALLATION PRELOAD
FAILURE #1 – TENSILE OVERLOAD

FAILURE #2 – TORSIONAL SHEAR (TWISTING)

FAILURE #3 – IMPACT SHEAR

FAILURE #4 – CYCLIC FATIGUE

FAILURE #5 – CYCLIC FATIGUE CRACKS PROPAGATED FROM RUST PITS

FAILURE #6 – CYCLIC FATIGUE CRACKS CAUSED BY IMPROPER INSTALLATION PRELOAD

Proper Maintenance Tips for Your Tonneau Cover
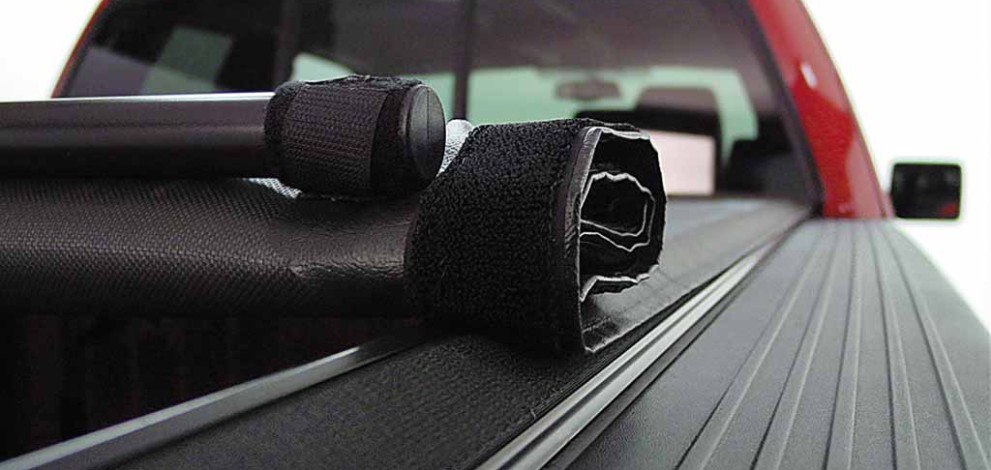
Canadian weather can be very unpredictable and very harsh. The winter can bring heaps of snow while the summer can sear your vehicle with its intense sun.
One of the best solutions for this type of weather is to equip your vehicle and protect your belongings with a tonneau cover.
But getting the most bang for your buck is not as easy as you might think.
Choosing a functional and durable high quality tonneau cover is just the first step. And that’s because a tonneau cover needs to feel the love.
…the love in this case would be properly caring for your tonneau by following our basic maintenance tips…
What’s the BEST tonneau cover? When you’re choosing a tonneau cover, go with a reputable brand name that you know you can trust.
Extang and UnderCover are brands recognized across the world for producing some of the most durable hard tonneaus.
Hard tonneau covers are the ultimate in durability and security. Your cargo will be secure from both the elements and prying hands.
But with this added protection also comes added weight.
The good news is that this won’t result in a drop in your fuel economy. The reason is that hard tonneau covers are actually more aerodynamic than their soft counterparts, which offsets their heavier weight factor.
Access, Bestop and Truxedo are top industry leaders for designing and manufacturing some of the most long-lasting soft tonneau covers.
Soft covers are easy to install due to their light weight while providing rudimentary protection against the elements.
But no matter which cover you decide to go with, you can be sure that TDot has it in stock!
When you’re choosing a tonneau cover, go with a reputable brand name that you know you can trust.
Extang and UnderCover are brands recognized across the world for producing some of the most durable hard tonneaus.
Hard tonneau covers are the ultimate in durability and security. Your cargo will be secure from both the elements and prying hands.
But with this added protection also comes added weight.
The good news is that this won’t result in a drop in your fuel economy. The reason is that hard tonneau covers are actually more aerodynamic than their soft counterparts, which offsets their heavier weight factor.
Access, Bestop and Truxedo are top industry leaders for designing and manufacturing some of the most long-lasting soft tonneau covers.
Soft covers are easy to install due to their light weight while providing rudimentary protection against the elements.
But no matter which cover you decide to go with, you can be sure that TDot has it in stock!
Tonneau Cover Maintenance Tonneau covers are.. expensive!
And when you’ve purchased and installed one, you’ll want to give it the proper care to make sure it lasts through the years.
The good news is that regular tonneau maintenance will be simple and inexpensive. And you’ll actually end up saving money down the road.
The most important thing is to regularly check your cover for scratches, bumps, dents, lodged debris, looseness and corrosion. If you spot anything out of the ordinary early on, you’ll be able to stop it from snowballing into a costly issue.
Inspect all cover mounting hardware, like clamps and bolts, to make sure it’s securely tightened. Because if it’s not, it could seriously damage your tonneau cover.
Slide and close your tonneau a few times to see if operates smoothly. And if that’s not the case, lubricate the rails to prevent any unwanted traction and wear.
Clean your cover with mild soaps that won’t harm its coat or your vehicle. But if your tonneau is made from vinyl, make sure you clean with a vinyl cleaner for the best results.
..When you’re drying it up, remember to do so with a soft cotton cloth or sponge.
And finally, don’t leave heavy equipment or cargo on top of the cover for longer than necessary. This could result in sagging and damage. But if you need to store any gear on top of your cover, make sure to first check the manual for its specific weight ratings.
Have any tonneau maintenance tips of your own? Share them with us in the comments!
Tonneau covers are.. expensive!
And when you’ve purchased and installed one, you’ll want to give it the proper care to make sure it lasts through the years.
The good news is that regular tonneau maintenance will be simple and inexpensive. And you’ll actually end up saving money down the road.
The most important thing is to regularly check your cover for scratches, bumps, dents, lodged debris, looseness and corrosion. If you spot anything out of the ordinary early on, you’ll be able to stop it from snowballing into a costly issue.
Inspect all cover mounting hardware, like clamps and bolts, to make sure it’s securely tightened. Because if it’s not, it could seriously damage your tonneau cover.
Slide and close your tonneau a few times to see if operates smoothly. And if that’s not the case, lubricate the rails to prevent any unwanted traction and wear.
Clean your cover with mild soaps that won’t harm its coat or your vehicle. But if your tonneau is made from vinyl, make sure you clean with a vinyl cleaner for the best results.
..When you’re drying it up, remember to do so with a soft cotton cloth or sponge.
And finally, don’t leave heavy equipment or cargo on top of the cover for longer than necessary. This could result in sagging and damage. But if you need to store any gear on top of your cover, make sure to first check the manual for its specific weight ratings.
Have any tonneau maintenance tips of your own? Share them with us in the comments!
What’s the BEST tonneau cover?
When you’re choosing a tonneau cover, go with a reputable brand name that you know you can trust.
Extang and UnderCover are brands recognized across the world for producing some of the most durable hard tonneaus.
Hard tonneau covers are the ultimate in durability and security. Your cargo will be secure from both the elements and prying hands.
But with this added protection also comes added weight.
The good news is that this won’t result in a drop in your fuel economy. The reason is that hard tonneau covers are actually more aerodynamic than their soft counterparts, which offsets their heavier weight factor.
Access, Bestop and Truxedo are top industry leaders for designing and manufacturing some of the most long-lasting soft tonneau covers.
Soft covers are easy to install due to their light weight while providing rudimentary protection against the elements.
But no matter which cover you decide to go with, you can be sure that TDot has it in stock!
Tonneau Cover Maintenance
Tonneau covers are.. expensive!
And when you’ve purchased and installed one, you’ll want to give it the proper care to make sure it lasts through the years.
The good news is that regular tonneau maintenance will be simple and inexpensive. And you’ll actually end up saving money down the road.
The most important thing is to regularly check your cover for scratches, bumps, dents, lodged debris, looseness and corrosion. If you spot anything out of the ordinary early on, you’ll be able to stop it from snowballing into a costly issue.
Inspect all cover mounting hardware, like clamps and bolts, to make sure it’s securely tightened. Because if it’s not, it could seriously damage your tonneau cover.
Slide and close your tonneau a few times to see if operates smoothly. And if that’s not the case, lubricate the rails to prevent any unwanted traction and wear.
Clean your cover with mild soaps that won’t harm its coat or your vehicle. But if your tonneau is made from vinyl, make sure you clean with a vinyl cleaner for the best results.
..When you’re drying it up, remember to do so with a soft cotton cloth or sponge.
And finally, don’t leave heavy equipment or cargo on top of the cover for longer than necessary. This could result in sagging and damage. But if you need to store any gear on top of your cover, make sure to first check the manual for its specific weight ratings.
Have any tonneau maintenance tips of your own? Share them with us in the comments!
Always Test the Water Depth
If you’re wondering what they’re saying:
-Here is the water already. Come on! Go, go, go, not enough, not enough.
-Come on, a little bit more! Alright, that’s enough.
-That’s it.
-Oh oh oh.
-Get out of here!
-Oh, poor fish. Poor fish.
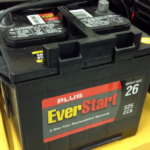
Essential Cooling System Checks

Summer is finally here.
And with summer comes hot, hot heat.
If you want to be sure that your dear offroader, muscle car, or daily driver is not going to suffer a slow, fiery…nightmare, make sure your cooling system is working as it should be.
How?
Open up the cold beverage of your choice, and run these simple checks.
CHECK COOLANT LEVELS & ANTIFREEZE STRENGTH
CHECK THE THERMOSTAT
CHECK FOR LEAKS
CHECK THE DRIVE BELT
CHECK COOLANT LEVELS & ANTIFREEZE STRENGTH

CHECK THE THERMOSTAT

CHECK FOR LEAKS

CHECK THE DRIVE BELT

Extreme Truck Driving Skills
An extreme 2-point turn like you’ve never seen before! That’s some nice reversing…
35” Tires vs 37” Tires
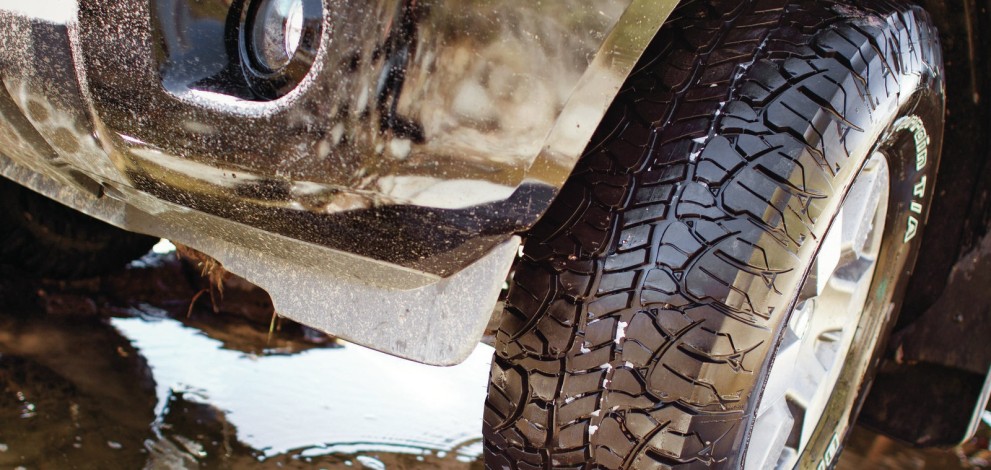
So you’re planning on buying new tires for your off-roader.
But which are best… 35” tires or 37” tires?
If you own a pickup or a Jeep, at one point or another you will have to make this choice.
Just make sure you know all the facts before making a commitment.
IS BIGGER BETTER? Bigger is better.
But not always.
It really depends on what you’re going to be using the tires for.
Don’t make the mistake of springing for 37” tires without understanding how much they could cost you in the long run.
The truth is that installing bigger tires could have a domino effect on the rest of your setup. You might end up having to upgrade key systems like your suspension, steering, brakes, and even your engine!
Bigger tires are heavier tires. And their weight will place a lot of additional strain on your vehicle. It’s more than likely that you’ll notice their adverse effect on components like the axles and drive shafts.
It’s likely that they’ll break. So be ready for some serious wear and tear.
But there are major benefits.
37” tires will deliver amazing handling characteristics.
And you’ll enjoy massive improvements in traction and clearance.
Bigger is better.
But not always.
It really depends on what you’re going to be using the tires for.
Don’t make the mistake of springing for 37” tires without understanding how much they could cost you in the long run.
The truth is that installing bigger tires could have a domino effect on the rest of your setup. You might end up having to upgrade key systems like your suspension, steering, brakes, and even your engine!
Bigger tires are heavier tires. And their weight will place a lot of additional strain on your vehicle. It’s more than likely that you’ll notice their adverse effect on components like the axles and drive shafts.
It’s likely that they’ll break. So be ready for some serious wear and tear.
But there are major benefits.
37” tires will deliver amazing handling characteristics.
And you’ll enjoy massive improvements in traction and clearance.
IS SMALLER BETTER? Be honest with yourself.
Are you only interested in 37” tires to look cool? Or are you actually planning to go off-roading?
..because if you need the tires for hard wheeling and rock crawling… they won’t disappoint.
But if you’re not a hardcore offroader, consider your budget before making a costly mistake for just 1 inch of additional ground clearance.
35” tires are easier on the pocket.
They won’t consume as much power, and you won’t have to stop at the fuel pump as often as you would with 37-inchers.
You’ll also accelerate quicker, and you’re braking distance won’t really be altered.
Be honest with yourself.
Are you only interested in 37” tires to look cool? Or are you actually planning to go off-roading?
..because if you need the tires for hard wheeling and rock crawling… they won’t disappoint.
But if you’re not a hardcore offroader, consider your budget before making a costly mistake for just 1 inch of additional ground clearance.
35” tires are easier on the pocket.
They won’t consume as much power, and you won’t have to stop at the fuel pump as often as you would with 37-inchers.
You’ll also accelerate quicker, and you’re braking distance won’t really be altered.
THE BOTTOM LINE It really doesn’t matter what size tires you equip your ride with.
Because once you start, you’ll always want to go higher.
Most enthusiast start with 32” tires, and then go up to 35” tires, and 37” tires.
But tire sizes will always be debated.
And ultimately, you’re the only one who knows what’s best for your vehicle.
It really doesn’t matter what size tires you equip your ride with.
Because once you start, you’ll always want to go higher.
Most enthusiast start with 32” tires, and then go up to 35” tires, and 37” tires.
But tire sizes will always be debated.
And ultimately, you’re the only one who knows what’s best for your vehicle.
IS BIGGER BETTER?
Bigger is better.
But not always.
It really depends on what you’re going to be using the tires for.
Don’t make the mistake of springing for 37” tires without understanding how much they could cost you in the long run.
The truth is that installing bigger tires could have a domino effect on the rest of your setup. You might end up having to upgrade key systems like your suspension, steering, brakes, and even your engine!
Bigger tires are heavier tires. And their weight will place a lot of additional strain on your vehicle. It’s more than likely that you’ll notice their adverse effect on components like the axles and drive shafts.
It’s likely that they’ll break. So be ready for some serious wear and tear.
But there are major benefits.
37” tires will deliver amazing handling characteristics.
And you’ll enjoy massive improvements in traction and clearance.
IS SMALLER BETTER?
Be honest with yourself.
Are you only interested in 37” tires to look cool? Or are you actually planning to go off-roading?
..because if you need the tires for hard wheeling and rock crawling… they won’t disappoint.
But if you’re not a hardcore offroader, consider your budget before making a costly mistake for just 1 inch of additional ground clearance.
35” tires are easier on the pocket.
They won’t consume as much power, and you won’t have to stop at the fuel pump as often as you would with 37-inchers.
You’ll also accelerate quicker, and you’re braking distance won’t really be altered.
THE BOTTOM LINE
It really doesn’t matter what size tires you equip your ride with.
Because once you start, you’ll always want to go higher.
Most enthusiast start with 32” tires, and then go up to 35” tires, and 37” tires.
But tire sizes will always be debated.
And ultimately, you’re the only one who knows what’s best for your vehicle.
Chevy Silverado Drifting
What do you think about this 2002 Chevy 2500HD 6.0 V8 drifting the track? … Because we love it!
Understeer / Oversteer – How Can I Fix Both?
Both understeer and oversteer are conditions which describe your vehicle’s steering sensitivity.
They occur more commonly in racing. And less so in street driving.
But understeer and oversteer can also result from harsh driving conditions, or your driving style and driving ability.
UNDERSTEER Understeer occurs when your vehicle turns less than you commanded with the steering wheel. It’s a common problem in front-wheel drive and all-wheel drive vehicles.
This is caused when the front tire drift is greater than the rear tire drift. To diagnose this problem, make a continuous turn by holding the wheel and throttle steady.
If your car ends up making a widening circle, you have understeer.
What do I do when I understeer?
You will probably understeer if you’re carrying too much speed into a corner.
And this will inhibit your vehicle from responding to your steering. It will turn less than you want it to.
If you find yourself in this situation, simply remove whatever factor is causing the skid.
Release the accelerator and lower your speed. Straighten the wheel and allow your front tires to gain back the needed traction.
How can I correct understeer?
• Raise the front tire pressure or lower the rear tire pressure
• Soften the front shocks or stiffen the rear shocks
• Soften the front springs or stiffen the rear springs
• Lower the front end or raise the rear end
• Install wider front tires or narrower rear tires
• Soften the front sway bar or stiffen the rear sway bar
• Increase the front negative camber
• Increase the positive caster
Understeer occurs when your vehicle turns less than you commanded with the steering wheel. It’s a common problem in front-wheel drive and all-wheel drive vehicles.
This is caused when the front tire drift is greater than the rear tire drift. To diagnose this problem, make a continuous turn by holding the wheel and throttle steady.
If your car ends up making a widening circle, you have understeer.
What do I do when I understeer?
You will probably understeer if you’re carrying too much speed into a corner.
And this will inhibit your vehicle from responding to your steering. It will turn less than you want it to.
If you find yourself in this situation, simply remove whatever factor is causing the skid.
Release the accelerator and lower your speed. Straighten the wheel and allow your front tires to gain back the needed traction.
How can I correct understeer?
• Raise the front tire pressure or lower the rear tire pressure
• Soften the front shocks or stiffen the rear shocks
• Soften the front springs or stiffen the rear springs
• Lower the front end or raise the rear end
• Install wider front tires or narrower rear tires
• Soften the front sway bar or stiffen the rear sway bar
• Increase the front negative camber
• Increase the positive caster
OVERSTEER Oversteer occurs when your vehicle turns more than what you command it to with the steering wheel. And it’s most common in rear-wheel drive vehicles.
The main cause of oversteer is the lack of traction in your rear tires. And when there’s less traction, the drift in the rear becomes greater than it is in the front. This prominent rear drift makes your car spin inward.
What do I do when I oversteer?
You’re probably driving a rear-wheel drive car. And you’ve probably entered the turn too quickly and your rear tires are slipping.
If you use too much power at a sharper steering angle, the resulting momentum will spin your rear around.
To counter this, steer your wheel in the direction of your skid. So if you’re turning right and your rear slides left, steer to the left.
How can I correct oversteer?
• Lower the front tire pressure or raise the rear tire pressure
• Stiffen the front shocks or soften the rear shocks
• Stiffen the front springs or soften the rear springs
• Raise the front end or lower the rear end
• Install narrower front tires or wider rear tires
• Stiffen the front sway bar or soften the rear sway bar
• Reduce the front negative camber
• Reduce the positive caster
Oversteer occurs when your vehicle turns more than what you command it to with the steering wheel. And it’s most common in rear-wheel drive vehicles.
The main cause of oversteer is the lack of traction in your rear tires. And when there’s less traction, the drift in the rear becomes greater than it is in the front. This prominent rear drift makes your car spin inward.
What do I do when I oversteer?
You’re probably driving a rear-wheel drive car. And you’ve probably entered the turn too quickly and your rear tires are slipping.
If you use too much power at a sharper steering angle, the resulting momentum will spin your rear around.
To counter this, steer your wheel in the direction of your skid. So if you’re turning right and your rear slides left, steer to the left.
How can I correct oversteer?
• Lower the front tire pressure or raise the rear tire pressure
• Stiffen the front shocks or soften the rear shocks
• Stiffen the front springs or soften the rear springs
• Raise the front end or lower the rear end
• Install narrower front tires or wider rear tires
• Stiffen the front sway bar or soften the rear sway bar
• Reduce the front negative camber
• Reduce the positive caster
With modern stability control systems, you don’t have to worry so much about under- or oversteering. But even the most advanced electronics can’t help you counter the laws of physics. So the best way of avoiding problems is to drive within your limits.
UNDERSTEER
Understeer occurs when your vehicle turns less than you commanded with the steering wheel. It’s a common problem in front-wheel drive and all-wheel drive vehicles.
This is caused when the front tire drift is greater than the rear tire drift. To diagnose this problem, make a continuous turn by holding the wheel and throttle steady.
If your car ends up making a widening circle, you have understeer.
What do I do when I understeer?
You will probably understeer if you’re carrying too much speed into a corner.
And this will inhibit your vehicle from responding to your steering. It will turn less than you want it to.
If you find yourself in this situation, simply remove whatever factor is causing the skid.
Release the accelerator and lower your speed. Straighten the wheel and allow your front tires to gain back the needed traction.
How can I correct understeer?
• Raise the front tire pressure or lower the rear tire pressure
• Soften the front shocks or stiffen the rear shocks
• Soften the front springs or stiffen the rear springs
• Lower the front end or raise the rear end
• Install wider front tires or narrower rear tires
• Soften the front sway bar or stiffen the rear sway bar
• Increase the front negative camber
• Increase the positive caster
OVERSTEER
Oversteer occurs when your vehicle turns more than what you command it to with the steering wheel. And it’s most common in rear-wheel drive vehicles.
The main cause of oversteer is the lack of traction in your rear tires. And when there’s less traction, the drift in the rear becomes greater than it is in the front. This prominent rear drift makes your car spin inward.
What do I do when I oversteer?
You’re probably driving a rear-wheel drive car. And you’ve probably entered the turn too quickly and your rear tires are slipping.
If you use too much power at a sharper steering angle, the resulting momentum will spin your rear around.
To counter this, steer your wheel in the direction of your skid. So if you’re turning right and your rear slides left, steer to the left.
How can I correct oversteer?
• Lower the front tire pressure or raise the rear tire pressure
• Stiffen the front shocks or soften the rear shocks
• Stiffen the front springs or soften the rear springs
• Raise the front end or lower the rear end
• Install narrower front tires or wider rear tires
• Stiffen the front sway bar or soften the rear sway bar
• Reduce the front negative camber
• Reduce the positive caster
With modern stability control systems, you don’t have to worry so much about under- or oversteering. But even the most advanced electronics can’t help you counter the laws of physics. So the best way of avoiding problems is to drive within your limits.